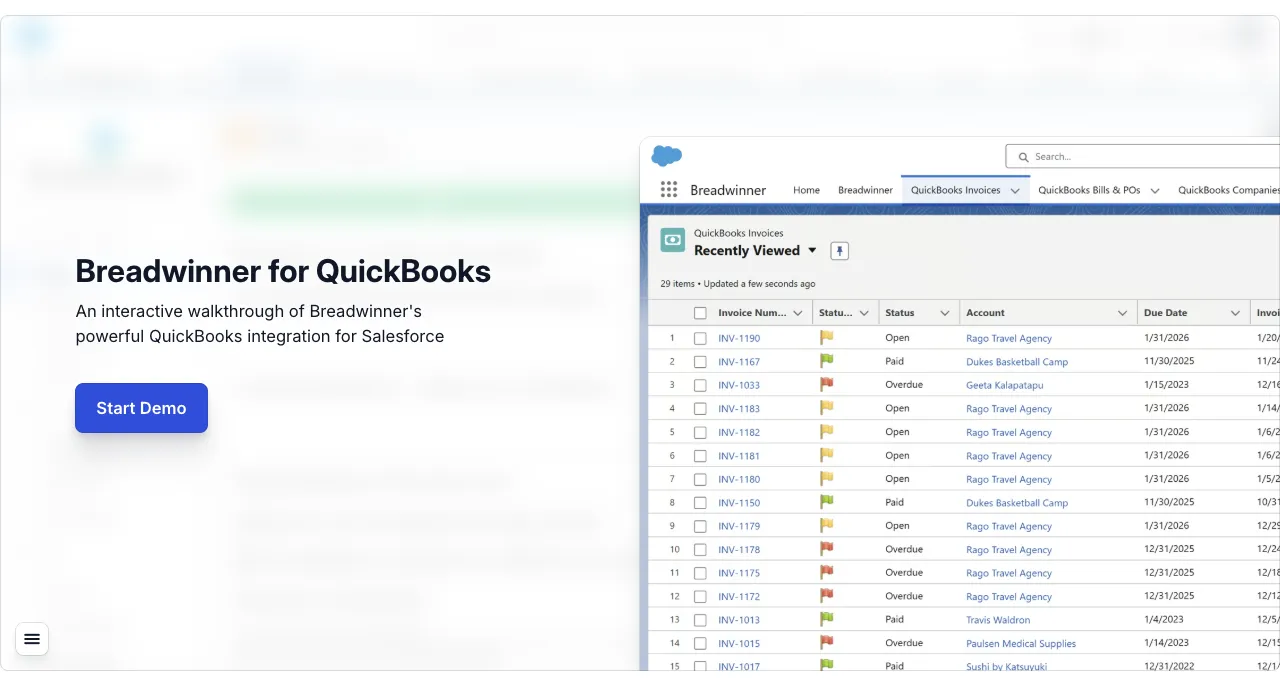
QuickBooks Salesforce Integration –
Native. Fast. Reliable. Real-Time.
The native QuickBooks Salesforce integration that installs in hours, not months. Bi-directional, real-time Salesforce QuickBooks integration — invoices, payments, and customer data synced automatically, all inside Salesforce.
QuickBooks · meet · Salesforce
Stop switching tabs to answer "did they pay?"
Every time a sales rep leaves Salesforce to check QuickBooks, they lose context — and most teams don't even have QuickBooks licenses for sales staff in the first place.
Breadwinner installs natively from the AppExchange and brings live invoices, payments, and customer balances onto the Salesforce record. No middleware. No iPaaS project. No data routed through a third-party cloud. Just QuickBooks data, where your team already works.
5 ★
105+ AppExchange reviews
Same-day
Install · Configure · Sync
Account
Dukes Basketball Camp$1,699.19
Total Overdue
$1,699.19
Total Due
$8,331.10
Total Paid
$10,030.29
Total Invoiced
142 Days
Overdue INV-1123
Powered by
Breadwinner
Account Name
Dukes Basketball Camp
Phone
(520) 420-5638
See this on your own data.
30-minute walkthrough · Wired to a real Salesforce sandbox · No commitment.
Why teams pick Breadwinner
Built for finance. Loved by sales. Trusted by IT.
Secure by design
Native Salesforce-managed package, SOC 2 Type II, and granular read/write permissions. Your finance data never leaves your Salesforce security boundary.
Live in hours
Smart field mappings come pre-configured. Most customers install, authenticate, and start syncing QuickBooks data the same day.
Real-time, two-way sync
Updates in Salesforce hit QuickBooks instantly — and vice versa. No batch jobs, no nightly cron, no stale invoice numbers.
A native, two-way integration
A quick and powerful sync between Salesforce and QuickBooks Online.
Breadwinner is built around three jobs the integration has to do well: keep teams productive, accelerate cash flow, and keep finance data accurate everywhere.
Eliminate double data entry.
Stop the copy-paste loop between Salesforce and QuickBooks. Edit contacts and addresses in Salesforce — they flow into QuickBooks automatically.
Edit QuickBooks contacts in Salesforce
Update billing or shipping addresses on a Salesforce account and the QuickBooks customer record updates instantly. No more double data entry.
Smart address matching
Breadwinner identifies missing addresses and discrepancies between the two systems and lets your team resolve them in a few clicks.
QuickBooks Companies
9 items · Updated a few seconds ago
| QuickBooks ID | Display Name | Salesforce Account | Curr. |
|---|---|---|---|
| BW - 0601 | Rago Travel Agency | Rago Travel Agency | USD |
| BW - 0628 | Dukes Basketball Camp | Dukes Basketball Camp | USD |
| BW - 0626 | Amy's Bird Sanctuary | Amy's Bird Sanctuary | USD |
| BW - 0625 | Geeta Kalapatapu | Geeta Kalapatapu | USD |
| BW - 0668 | Computers by Jenni | Computers by Jenni | USD |
| BW - 0651 | Tim Philip Masonry | Tim Philip Masonry | USD |
Speed up time-to-payment.
Reps create QuickBooks invoices the moment a deal closes — no waiting on finance, no rekeying. Status flows back so collections has eyes on what matters.
Create invoices from any object
Generate QuickBooks invoices from accounts, opportunities, orders, or any custom object — without leaving the Salesforce record.
Track invoice status in real time
Overdue, due, paid — surfaced on the account so reps and collections can act without logging into QuickBooks.
New QuickBooks Invoice for
Rago Travel Agency
Company
Rago Travel Agency
753 Cedar St.
Bayshore, CA 94326
Contact
Jeff Rago
Rago_Travel@intuit.com
QuickBooks Org
![]() Test Company
Test Company
Connected
Invoice Details
Terms
Invoice Number
Invoice Date
Due Date
Work with critical data, in real time.
Sales reps see exactly what finance sees — outstanding balance, payment history, credit context. Invoices go out clean because the source data is clean.
Live A/R on every account
Sales sees the customer's full financial health in Salesforce — outstanding balance, payment history, credit context. No more pulling finance into every conversation.
Pre-populated invoice fields
Pull from default fields or wire in custom logic for due dates, discounts, prices, tax rates, and custom fields. Invoices go out clean the first time.
Invoice
INV-1167
Billing Address
Peter Dukes
Dukes Basketball Camp
25 Court St., Tucson, AZ
Status
Paid
Fully Paid
12/12/2025
Invoice Date
11/24/2025
Due Date
11/30/2025
Ready to swap copy-paste for two-way sync?
Same-day install · Pre-configured field mappings · Free 14-day trial.
Now with native Stripe
The only solution that bridges Salesforce, QuickBooks, and Stripe.
Quote in Salesforce. Bill in QuickBooks. Collect through Stripe. End-to-end visibility from quote to cash, without the spreadsheets in between.

Salesforce
Where deals close
QuickBooks
Where invoices live

Stripe
Where payments arrive
Real-time revenue insights
Stripe charges, refunds, and subscriptions surface inside Salesforce records.
Faster time-to-value
Pre-built Stripe objects and field mappings — up and running in minutes.
Seamless payment sync
Stripe payments flow into Salesforce alongside QuickBooks invoices.
Unified, error-free workflows
Eliminate manual reconciliation between Stripe and QuickBooks.
Have Stripe in your stack?
We'll show you Salesforce + QuickBooks + Stripe end-to-end in one walkthrough.
Multi-org support
Multiple QuickBooks orgs. One Salesforce.
Different countries, currencies, or legal entities? Connect every QuickBooks org to a single Salesforce instance and manage them from one place — without losing the per-org boundaries finance teams need.
Unified dashboard
View and manage data across every connected QuickBooks org from one Salesforce instance.
Cross-currency ready
Handle multi-currency transactions cleanly across regional or subsidiary orgs.
Centralized control
Permissions, field mappings, and sync settings — configured per-org, governed centrally.
Breadwinner
Setup & Config
Tools
Setup
Breadwinner · QuickBooks
Acme US
342 invoices · USD
Acme UK
187 invoices · GBP
Acme APAC
94 invoices · AUD
Multiple QuickBooks orgs? We've got you.
Multi-currency, multi-entity, single Salesforce instance. Talk to a multi-org expert.
Make your Salesforce agents finance-fluent.
An Agentforce agent is only as good as the data it can ground in. Breadwinner exposes live QuickBooks records inside Salesforce — full data, not stubs — so your agents, Prompt Builder templates, and prediction models all get the financial context they need.
Our Agentforce Accelerator ships with pre-built topics and actions for billing, payments, invoices, and account health — so you go from install to a finance-fluent agent in under an hour.
Agentforce Topics & Actions
Answer in natural language
"What's overdue for Acme Corp?" Your Agentforce agents respond using live QuickBooks data — pre-built topics and actions ship with Breadwinner's Agentforce Accelerator.
Prompt Builder
Auto-draft collections nudges
Generate personalized payment reminders that reference the actual unpaid invoice and customer history — grounded in real records, not summaries.
Agent Builder
Flag at-risk accounts proactively
Design Agentforce agents that watch invoice and payment patterns — surfacing accounts at risk of going overdue before they become collections issues.
Ready to give Agentforce the finance data it needs?
See QuickBooks + Salesforce live — with pre-built Agentforce topics, actions, and Prompt Builder templates wired to real records.
Why Breadwinner
Buy, build, or invent?
iPaaS and project-based integrations take weeks or months to deliver value — and never stop costing you. Breadwinner is native, extensible, and adds value in hours.
Turn-key Product
Buy

A native, extensible integration that installs in minutes and delivers value in hours — not weeks or months. Pre-configured with smart field mappings and full flexibility for custom use cases.
Use for: Fast, reliable integration between your finance system and Salesforce
iPaaS Project
Build

A generalist middleware platform that connects systems in a many-to-many pattern. Requires ongoing maintenance, middleware expertise, and often months of development.
Use for: Large, multifaceted integration projects spanning multiple platforms
Custom Code
Invent

Building and maintaining your own integration layer from scratch. Long-running, expensive, and a constant drain on engineering resources.
Use for: Highly custom needs unsolvable with existing solutions
Trusted. Future proof.
Built to enterprise standards.
AppExchange certified
5★ · 105+ reviews
SOC 2 Type II
Audited annually

Salesforce Partner
Since 2014
Customer stories
Receipts from real QuickBooks teams.
Integrations live or die on the implementation. Here's how three QuickBooks-powered teams — across logistics, membership organizations, and nonprofits — actually got Breadwinner into production, and the outcomes they pulled out the other side.
30 → 5 min
per invoice — 15 work days reclaimed every month across 250+ invoices
"If you have Salesforce and you have QuickBooks and you don't have Breadwinner, I don't know what you're doing."
70%
less time spent chasing due and overdue payments
"The biggest time-saving has to be debtor chasing, which now takes me 30% of the time it used to."
5 years
in production with zero data mismatches between Salesforce and QuickBooks
"Breadwinner takes the functionality of QuickBooks and brings it right into your Salesforce account."
Want to talk to one of these teams directly?
We'll connect you with a current Breadwinner customer running QuickBooks at similar scale — references on request.
From customers
You're in good company.
"We needed a platform that was going to deliver on what it promised. Breadwinner's installation process was straightforward and smooth with a quick implementation session. We were set up and ready to go within an hour."
Helen Keevil
Head of UK Sales, Hummingbird Technologies
"We sought a solution that leverages automation and software to do these mundane tasks so our staff can focus on customer-facing actions that drive the business. With Breadwinner, the result is we're more efficient and productive with fewer manual processes."
Darwin Stephenson
Chief Revenue Officer, Apkudo
"The issue with doing manual data entry is you have to double-check it and triple-check it. Breadwinner became a key player, acting as the bridge between the two pieces of software that allowed us to quickly and simply move information."
Morgan Selph
President, PlaySpace Designs
How it works
How the Breadwinner QuickBooks Salesforce connector works
Three things determine whether an integration will hold up in production: how updates flow, what records are kept in sync, and how much control admins have over the mapping. Here's how Breadwinner handles each.
Two-way, real-time sync
Breadwinner keeps Salesforce and QuickBooks Online continuously aligned via a bi-directional sync engine. When a rep creates an invoice in Salesforce, it appears in QuickBooks within seconds. When finance records a payment in QuickBooks, the paid status flows back to the Salesforce account instantly. No nightly batch job, no polling cron, no stale data on the account page. If either system experiences downtime, sync operations queue and retry automatically once connectivity is restored.
Objects synced
Customers & Contacts, Invoices, Payments, Credit Memos, Estimates, and Items/Products all sync bi-directionally between QuickBooks Online and Salesforce. Each object is represented as its own Salesforce custom object under Breadwinner's managed package, so admins can extend it with fields, validations, and Flow triggers just like any Salesforce object. QuickBooks records surface directly on the Account page — no navigating away.
Field mapping & extensibility
Smart default field mappings ship pre-configured for QuickBooks Online. Custom mappings are point-and-click via the guided admin UI — no code required. For advanced logic (conditional sync, custom validation, workflow integration), Breadwinner exposes a full Apex API and native Salesforce Flow support, so your developers can extend the integration without leaving Salesforce or introducing middleware.
Frequently asked questions
Common questions about integrating QuickBooks with Salesforce.
QuickBooks Salesforce integration is a two-way, native connection between your Salesforce CRM and QuickBooks Online that keeps financial data synchronized across both platforms automatically and in real time. When a payment is recorded in QuickBooks, it appears instantly in Salesforce. When a sales rep creates an invoice in Salesforce, it flows straight into QuickBooks. The integration works without manual export, copy-paste, or waiting.
Most companies operate the two systems in isolation. Sales lives in Salesforce and finance lives in QuickBooks. Every time a rep needs to know whether an invoice has been paid, they email or Slack someone in finance and wait. Every time a new customer is created, someone enters it in both systems and hopes they match. Integration eliminates that friction permanently.
Breadwinner for QuickBooks is a native Salesforce app. It installs directly inside your Salesforce org — not routed through external middleware. It syncs customers, invoices, payments, credit memos, estimates, items, and products between the two systems in real time, with configurable field mappings, granular permissions, and no coding required.
Breadwinner syncs the core financial objects your teams work with every day and gives you full control over how each one maps between the two systems.
Customers & Contacts: Customer records in QuickBooks sync to Accounts and Contacts in Salesforce. New customers created in either system appear in the other automatically. Address-matching logic identifies and resolves discrepancies between the two records.
Invoices: Invoices can be created directly from Salesforce — from Accounts, Opportunities, Orders, or custom objects — and sync instantly to QuickBooks. Invoice status (draft, sent, paid, overdue) is always current in Salesforce without anyone switching tabs.
Payments: Payments recorded in QuickBooks sync back to Salesforce in real time. Sales reps see exactly what's been paid, what's outstanding, and what's overdue — directly on the account record.
Credit Memos & Estimates: Credit memos issued in QuickBooks appear in Salesforce. Estimates created in Salesforce can flow to QuickBooks for conversion to invoices.
Items & Products: QuickBooks items and products sync to Salesforce Products and Price Books. Invoice line items reference synced product records, keeping your catalog consistent across both systems.
Custom Field Mappings: Every field mapping is configurable. If your Salesforce opportunity fields don't match QuickBooks invoice fields out of the box, Breadwinner's mapping interface lets you define the relationship without writing code.
The companies that get the most from a QuickBooks Salesforce integration typically share a few common traits: they run their sales pipeline in Salesforce and run their books in QuickBooks Online, and they've outgrown the workaround of manually keeping the two in sync.
SMBs with active sales teams: Companies with 10–200 staff and 5–50 Salesforce licenses feel the pain of disconnected systems most acutely. Sales reps are constantly asking finance for invoice status; finance is manually re-entering customers that sales already created. Breadwinner eliminates both problems.
Professional services firms: Agencies, consultancies, and managed service providers that invoice clients regularly — and track client relationships in Salesforce — benefit from having invoice history, payment status, and A/R data visible directly on every account record.
Wholesale and distribution businesses: Companies managing high invoice volumes across many accounts need payment tracking that doesn't require opening QuickBooks for every inquiry. Surfacing that data in Salesforce puts it where the account team already works.
Multi-entity businesses: Organizations running multiple QuickBooks companies — regional offices, subsidiaries, or separate legal entities — can connect all of them to a single Salesforce org with Breadwinner's multi-org support.
If your team is spending more than a few hours a week manually moving data between QuickBooks and Salesforce, that's the clearest signal that integration is overdue.
Are you a developer building a custom integration? Read our step-by-step developer guide to connecting QuickBooks and Salesforce with Apex.
Looking for more demo content? Watch our Breadwinner for QuickBooks video demo library — invoice creation, payment sync, and multi-org workflows in Salesforce.
Pricing
Starting from $310/mo
Simple, transparent pricing for QuickBooks + Salesforce. All plans billed annually with full support included.
QuickBooks + Salesforce Integration
See Breadwinner
in Action
Book a 30-minute live walkthrough with our team. We'll show you how Breadwinner connects QuickBooks and Salesforce in real time — tailored to your business.
30-minute live demo
Tailored to your use case, with time for questions.
Technical Q&A
Bring your admin — we'll answer the hard questions.
No pressure
No sales pitch. Just a walkthrough so you can evaluate.
SOC 2 certified
A decade of trust handling sensitive finance data.
Ready to connect QuickBooks and Salesforce?
See how Breadwinner syncs data in real time. Set up in under an hour.